Recently I’ve been working on adding the Android M Runtime Permissions support to the project I’m on at the moment. As an Android user, I find runtime permissions awesome. Permission model was not very user-friendly before Marshmallow: every time you were trying to install an app, you were presented with a long list of permissions that you have to grant to that app without even seeing it in action! Most times those apps won’t have any malicious intentions and will require certain permissions for some secondary features, but it still looks nasty. As an Android M user, you won’t be forced to make the decision upfront: the apps are now required to ask for permissions at run time and provide enough context on why the permission is needed. Even if the user decides to deny the permission, this will only result in her not being able to use a certain feature - but not the whole app. Overall, this makes complete sense to me, and I enjoy being in control of the apps I use on my Android M device.
However, things are not that rosy for us developers, or, better said, it’s a pain. There are many possible scenarios that you have to keep in mind. Additionally, I can’t say I like the official APIs for working with runtime permissions: they’re quite verbose, and the callbacks just force your code to be scattered around and lose in readability.
Another problem that I was aware of after reading Handling Android runtime permissions in UI tests is that adding support for runtime permissions will inevitably break our Espresso tests. My team relies on automated UI tests to catch regressions in the most crucial user flows, and it’s worked fine for us so far. Turns out, Espresso just doesn’t care about runtime permissions, as it doesn’t provide any means of dealing with permission dialogs. The following won’t work:
onView(withText("ALLOW")).perform(click());
The reason behind this is that the permission dialog is an Activity from a different package, and Espresso can’t access it. Luckily, there is a solution - the UiAutomator framework. UiAutomator is more flexible than Espresso: it doesn’t limit your tests to your application, allowing you to navigate anywhere on the device and interact with any UI elements. Still, unlike Espresso, it doesn’t do any internal synchronizations leading to more flaky tests, and its APIs are not as simple and intuitive as the Espresso ones. We’ll use the combination of both to write UI tests for a simple application that requires the access to Contacts.
The demo app
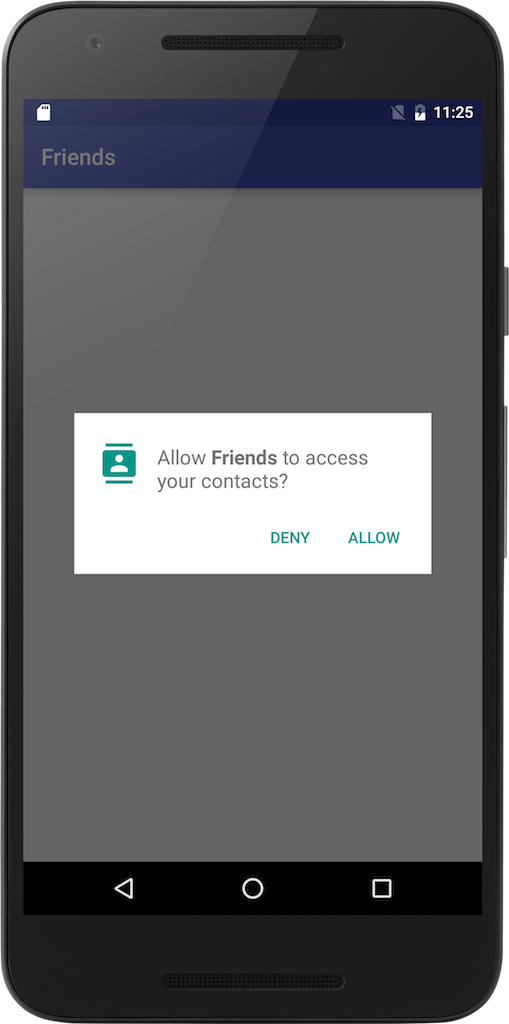
First thing that our app wants to do is to load a list of contacts from the device’s Contacts database. As soon as the app is opened, it will ask the permission to access Contacts:
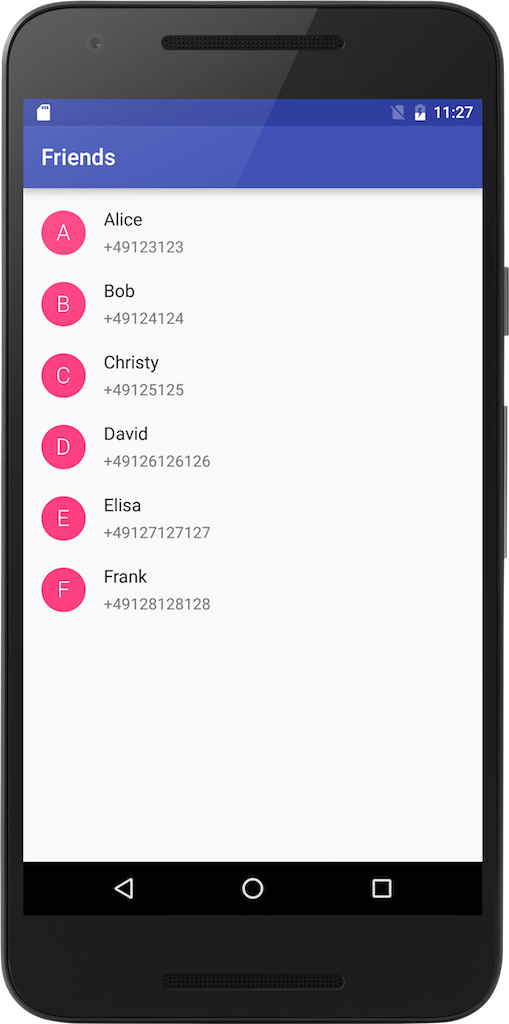
If the user taps Allow, we’ll proceed and load the contacts from the database:
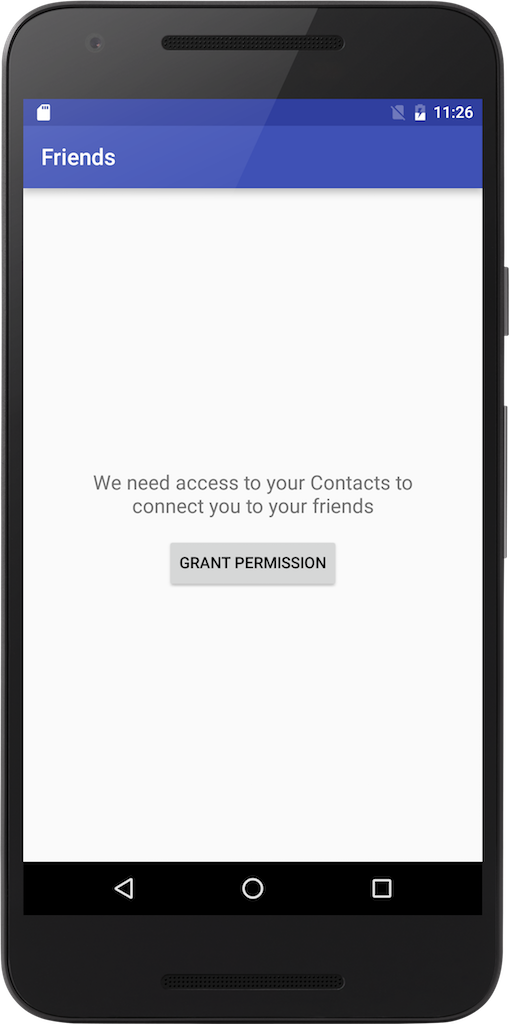
We’d also like to handle possible edge cases, such as if the user taps on Deny button, therefore not granting us the permission to access Contacts. In this scenario we’d like to show some short rationale and provide a button that will help user grant the required permission if she changes her mind:
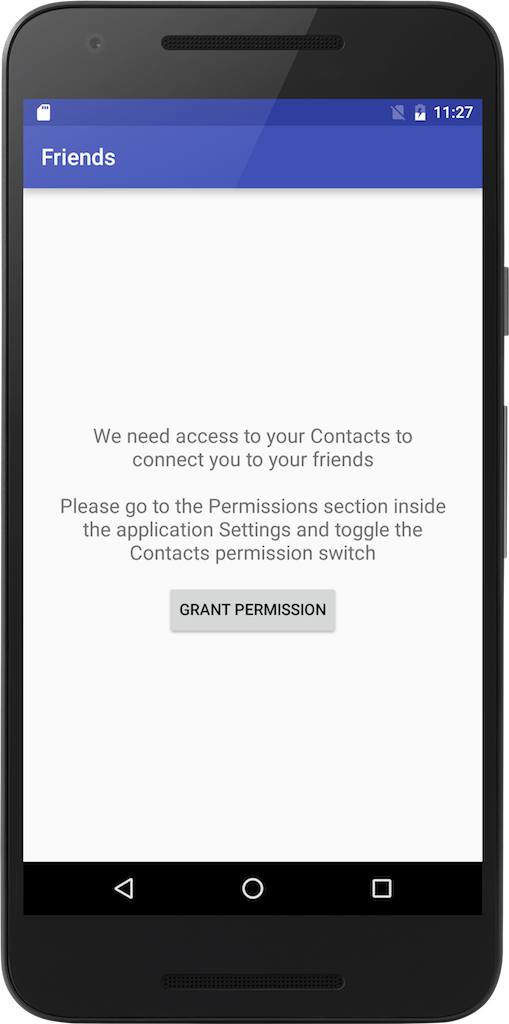
Another possible scenario is that the user checks the Never ask again check mark and taps Deny, and then at a later point decides she still needs this functionality. This sounds like a real edge case, but we want to be prepared. And since we can’t bring the permission dialog back anymore, the only way to fix it is to help the user navigate to the application Settings and toggle the switch for the Contacts permission inside the Permissions screen. We’ll need our longer rationale for this:
Alright, now let’s see how we can use the combination of Espresso and UiAutomator to implement the test cases for these scenarios. For the complete code example please visit the repo page on GitHub.
Setting up UiAutomator
UiAutomator comes with the local Maven repository that is a part of the Android SDK, so you can
simply add this line to the build.gradle file:
dependencies {
    // other dependencies

    androidTestCompile 'com.android.support.test.uiautomator:uiautomator-v18:2.1.2'
}
However, if your minimum SDK level is set to a value below 18, the build will fail, yielding something like this:
Error:Execution failed for task ':app:processDebugAndroidTestManifest'.
> java.lang.RuntimeException: Manifest merger failed : uses-sdk:minSdkVersion 16 cannot be smaller than version 18 declared in library [com.android.support.test.uiautomator:uiautomator-v18:2.1.2] /<app-path>/app/build/intermediates/exploded-aar/com.android.support.test.uiautomator/uiautomator-v18/2.1.2/AndroidManifest.xml
  	Suggestion: use tools:overrideLibrary="android.support.test.uiautomator.v18" to force usage
As the error message suggests, this can be fixed by adding the tools:overrideLibrary element to
the Manifest, but the trick is that it should end up inside a Manifest file under the androidTest
directory, so just create one with the following contents:
<?xml version="1.0" encoding="utf-8"?>
<manifest
    package="me.egorand.contactssync"
    xmlns:tools="http://schemas.android.com/tools">
    <uses-sdk tools:overrideLibrary="android.support.test.uiautomator.v18"/>
</manifest>
Now the build runs normally and we’re good to go.
Test case A: Request permission dialog is displayed
First, let’s write a test that will simply verify that the request dialog is shown as soon as we open the application. Remember, we can’t do this with Espresso, since it doesn’t have access to any UI that’s outside our package. Therefore we’ll use UiAutomator, and we’ll create a helper method that looks like this:
public static void assertViewWithTextIsVisible(UiDevice device, String text) {
    UiObject allowButton = device.findObject(new UiSelector().text(text));
    if (!allowButton.exists()) {
        throw new AssertionError("View with text <" + text + "> not found!");
    }
}
UiDevice is an abstraction that UiAutomator uses to interact with the test device: in addition to
the findObject() method, that helps us get hold of the UI components on the screen, it has a bunch
of methods such as pressBack(), pressHome() and others. UiSelector is a class that helps us
build a query which we can pass to findObject() to locate the UI component we’re interested in.
At the end of the test we’d also want to dismiss the permission dialog to avoid having it on the screen when the next test starts. To Deny the permission, we’ll use the following helper method:
public static void denyCurrentPermission(UiDevice device) throws UiObjectNotFoundException {
    UiObject denyButton = device.findObject(new UiSelector().text(TEXT_DENY));
    denyButton.click();
}
This method uses the same approach to locate the Deny button, and then invokes click() to interact
with it. Note that the method will throw a UiObjectNotFoundException if it can’t find the button
on the screen.
Having these methods, we’ll be able to create the following test method:
@Test
public void a_shouldDisplayPermissionRequestDialogAtStartup() throws Exception {
    assertViewWithTextIsVisible(device, "ALLOW");
    assertViewWithTextIsVisible(device, "DENY");

    // cleanup for the next test
    denyCurrentPermission(device);
}
Note that the method name starts with a. I’m doing this here to control the order in which the
test methods will be invoked by the test runner. By the way, don’t expect JUnit to figure this out
automatically, if you need a certain order for your test methods, add the following annotation to
the test class:
@FixMethodOrder(MethodSorters.NAME_ASCENDING)
I felt reluctant to impose the strict ordering for the tests, since I believe it’s always better if the tests are independent. But in order to have a suite of independent tests we need to implement the cleanup properly, bringing the application state to initial after every test. In this particular example this would mean that we have to make sure all permissions are revoked before each test starts. The problem with this approach is that the application process is killed when you revoke a permission. The test runner doesn’t expect this kind of behavior, therefore the tests will fail to run to completion. Hence, we’ll have to resort to the strict ordering in this test suite.
To make this test pass, we’ll do the following inside the Activity:
@Override
protected void onResume() {
    super.onResume();

    int permissionStatus = ContextCompat.checkSelfPermission(this, Manifest.permission.READ_CONTACTS);
    if (permissionStatus == PackageManager.PERMISSION_GRANTED) {
        loadContacts();
    } else if (!isPermissionAlreadyDenied) {
        ActivityCompat.requestPermissions(this, new String[]{Manifest.permission.READ_CONTACTS},
                    REQ_CODE_PERMISSIONS_READ_CONTACTS);
    }
}
If the permission is already granted, we’ll just load the contacts, otherwise we’ll request the
permission. We’ll also keep a flag called isPermissionAlreadyDenied to avoid requesting the
permission immediately after Deny was clicked, since the closing of the permission dialog will
trigger onResume().
Test case B: Short rationale is shown if the permission is Denied
Let’s now Deny the permission and verify that the rationale is shown:
@Test
public void b_shouldDisplayShortRationaleIfPermissionWasDenied() throws Exception {
    denyCurrentPermission(device);

    onView(withText(R.string.permission_denied_rationale_short)).check(matches(isDisplayed()));
    onView(withText(R.string.grant_permission)).check(matches(isDisplayed()));
}
Notice that as soon as we’re back to interacting with our own UI, we can safely continue using the Espresso API.
The following snippet inside the Activity class should make this test pass:
@Override
public void onRequestPermissionsResult(int requestCode, @NonNull String[] permissions,
                                           @NonNull int[] grantResults) {
    if (requestCode == REQ_CODE_PERMISSIONS_READ_CONTACTS && grantResults.length > 0) {
        int grantResult = grantResults[0];
        if (grantResult == PackageManager.PERMISSION_GRANTED) {
            loadContacts();
        } else {
            isPermissionAlreadyDenied = true;
            if (ActivityCompat.shouldShowRequestPermissionRationale(this, Manifest.permission.READ_CONTACTS)) {
                permissionDeniedRationaleView.setText(R.string.permission_denied_rationale_short);
            }
            permissionDeniedView.setVisibility(View.VISIBLE);
        }
    } else {
        super.onRequestPermissionsResult(requestCode, permissions, grantResults);
    }
}
Test case C: Long rationale is shown if the permission is Denied permanently
By “denied permanently” I mean that the user has checked the Never ask again check mark, thus preventing us from displaying permission dialogs in the future. The following test verifies that we’re showing a longer rationale that contains the instructions on how to grant the permission from the Settings screen:
@Test
public void c_shouldDisplayLongRationaleIfPermissionWasDeniedPermanently() throws Exception {
    denyCurrentPermissionPermanently(device);

    onView(withText(R.string.permission_denied_rationale_long)).check(matches(isDisplayed()));
    onView(withText(R.string.grant_permission)).check(matches(isDisplayed()));

    // will grant the permission for the next test
    onView(withText(R.string.grant_permission)).perform(click());
    openPermissions(device);
    grantPermission(device, "Contacts");
}
We’re using another helper method called denyCurrentPermissionPermanently:
public static void denyCurrentPermissionPermanently(UiDevice device) throws UiObjectNotFoundException {
    UiObject neverAskAgainCheckbox = device.findObject(new UiSelector().text(TEXT_NEVER_ASK_AGAIN));
    neverAskAgainCheckbox.click();
    denyCurrentPermission(device);
}
It will tick the check mark prior to denying the permission.
Additionally, we’re including some cleanup code that will prepare the setting for our next test. We need to navigate to the Settings screen, then open the Permissions page and grant the permission by toggling the switch. The logic of opening the Settings screen should be implemented in the Activity code, so the test code can just tap on the Grant permission button, and then use the following methods:
public static void openPermissions(UiDevice device) throws UiObjectNotFoundException {
    UiObject permissions = device.findObject(new UiSelector().text(TEXT_PERMISSIONS));
    permissions.click();
}
public static void grantPermission(UiDevice device, String permissionTitle) throws UiObjectNotFoundException {
    UiObject permissionEntry = device.findObject(new UiSelector().text(permissionTitle));
    permissionEntry.click();
}
Inside the Activity code, we’ll update the onRequestPermissionsResult() code with the following:
...
if (ActivityCompat.shouldShowRequestPermissionRationale(this, Manifest.permission.READ_CONTACTS)) {
    permissionDeniedRationaleView.setText(R.string.permission_denied_rationale_short);
} else {
    permissionDeniedRationaleView.setText(R.string.permission_denied_rationale_long);
}
...
Unfortunately, the Android API doesn’t provide a clear way to identify the fact that Never ask
again was checked, therefore we’ll have to rely on the behavior of
shouldShowRequestPermissionRationale(), which returns false in this case.
The click handler code for the Grant permission button looks like this:
public void onGrantPermission(View view) {
    if (ActivityCompat.shouldShowRequestPermissionRationale(this, Manifest.permission.READ_CONTACTS)) {
        ActivityCompat.requestPermissions(this, new String[]{Manifest.permission.READ_CONTACTS},
                    REQ_CODE_PERMISSIONS_READ_CONTACTS);
    } else {
        goToSettings();
    }
}

private void goToSettings() {
    Uri uri = Uri.fromParts("package", getPackageName(), null);
    Intent settingsIntent = new Intent(Settings.ACTION_APPLICATION_DETAILS_SETTINGS, uri);
    settingsIntent.addFlags(Intent.FLAG_ACTIVITY_NEW_TASK);
    startActivity(settingsIntent);
}
With everything ready, let’s jump to the last test case.
Test case D: Should load contacts if the permission is granted
This one is pretty straightforward:
@Test
public void d_shouldLoadContactsIfPermissionWasGranted() throws Exception {
    for (Contact contact : TEST_CONTACTS) {
        onView(withText(contact.name)).check(matches(isDisplayed()));
        onView(withText(contact.phoneNumber)).check(matches(isDisplayed()));
    }
}
Since we’ve previously granted the permission, the code for loading the contacts should fire, and we’ll have the list populated.
Conclusion
In the short example above we’ve managed to implement a few test cases to verify correct user interactions with the permission dialog. Unfortunately, Espresso doesn’t allow us to interact with system dialogs, so we used UiAutomator, which is perfectly compatible with Espresso. The tests helped us implement the user flow correctly, and to make sure we’re handling the edge cases properly.
Check out the complete source code for this example on GitHub. The UiAutomatorUtils class is a collection of reusable helper methods for the scenarios described in this example, feel free to copy it into your project.
Cheers!